A crash is one of the most annoying and frustrating things that can happen when using your personal computer. Computer crashes can also cause extensive damage to your hard drive. The dreaded "STOP 0x000000ED UNMOUNTABLE_BOOT_VOLUME" error message indicates that Windows XP cannot boot from your main hard drive; you will not be able to start up your computer. Luckily, you can fix the "unmountable boot volume" error message in Windows XP. Read on to learn how to first diagnose the problem and then rectify it.
Instructions
Diagnose
- Determine if you have your BIOS settings configured so as to force faster UDMA modes. In this case, you can solve the problem if you restart your computer, enter the BIOS and then load the "fail-safe" default settings. Next, reboot the computer, and the problem will be fixed.
- Find out if you used the wrong IDE cables. This error can commonly be caused when you swap hard drives and use the wrong IDE cables to connect them. You may experience this error if your computer uses Ultra Direct Memory Access or the UDMA hard-disk controller with a standard 40-wire connector cable. In this case, you can fix the problem simply by using the correct IDE cables when using these hard-disk controllers.
- If none of these possible causes corresponds with your problem, then complete the steps in Section 2.
- Boot up your computer from your Windows XP installation CD. Insert the XP CD into your CD-ROM drive and turn on your computer.
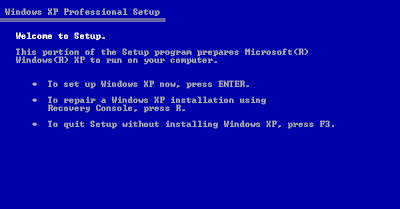
- Set your BIOS to boot from CD. Your system's BIOS settings can be opened by hitting the "F2," "F8," "F8" or "Delete" key on your keyboard as the computer boots up. The specific key differs depending on your computer's manufacturer. When you see the message "Press any key to boot from CD," tap any key on your keyboard and wait until you see the "Welcome to Setup" screen.
- Hit "R" to use your Recovery Console to repair the installation. If you have a dual-boot computer, you need to select the particular Windows installation you would like to access.
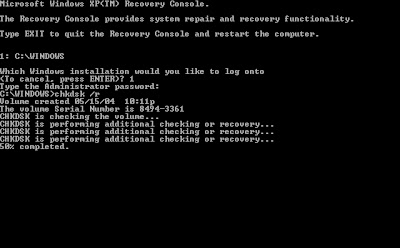
- Type in your administrative password when the computer prompts you to. If you have no password, simply press "Enter." This will bring you to the command prompt.
- Type in "CHKDSK /R" and press "Enter." CHKDSK will now scan and repair your hard drive. Type "Exit" when this process is complete.
- Press "Enter" to restart the computer. Your computer should now boot properly, without that annoying error.


No comments:
Post a Comment